It is, of course, possible to set up an email signature in your webmail at Polar55. If you are using Outlook or another mail client, you should set up the signature through that client.
Here is the guide for our webmail:
-
Log in to your Webmail: You can access your webmail via your browser at webmail.domain.com or through cPanel by navigating to "Email Accounts" and then selecting "Check Mail."
-
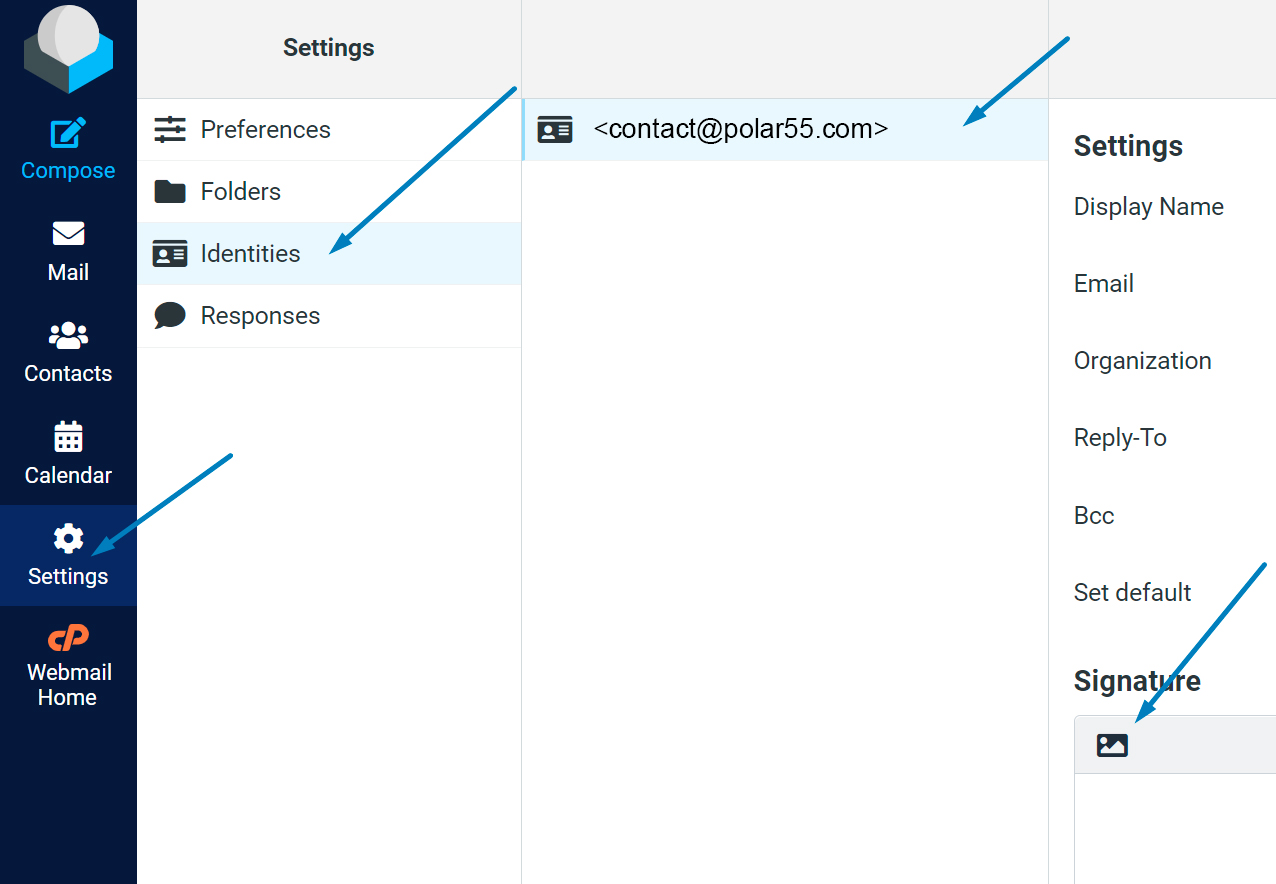
Open Settings: Once logged in, click on "Settings" on the left side of the screen. This icon often looks like a gear.
-
Go to Identities: Inside the settings menu, find and click on "Identities." Here you will have access to edit your email identities.
-
Select the desired identity: If you have multiple email identities set up, select the one where you want to add a signature.
-
Add your signature: In the chosen identity setting, you will see a signature field. Here, you can enter the desired text for your signature. If you want to use formatting tools such as bold, italics, or links, click on the small image icon, which will open the formatting options.
-
Save your changes: When you are satisfied with your signature, scroll down and click on "Save" to apply the changes.
-
Finish and check your signature: Close the settings and return to your inbox. From now on, your signature will automatically be added to all emails you send from the selected identity.
-
If you want to add a logo: If you wish to include a logo in your signature, it is recommended to keep the image at a maximum of 300 px in width and 75 px in height, and ensure the file does not exceed 64 KB in size.
Tip: To reduce the risk of your emails ending up in the recipient's spam folder, it is a good idea to limit the number of links and images in the signature.
Below is a screenshot showing the buttons you need to click to add a signature:

That's it! Your signature is now set up and ready to use in Polar55 webmail.
