Are you in the process of moving a WordPress site to our server and haven't changed DNS yet? You might experience that your WordPress site looks incorrect.
This happens because your WordPress installation is essentially set up on your domain with us, and therefore, WordPress tries to load files on your domain even when you access it via the temporary URL.
To view your WordPress site correctly on our server (before changing DNS), you can do two things:
- Change your host file on your local computer.
- Make adjustments in your WordPress installation.
We recommend using solution 2. In simple terms, you need to tell your computer through the host file that when you visit your domain from your computer, you should not get the content from your old and current server but instead get the content from our server. This way, you can see and work with your site as it appears on our server before changing DNS.
If this solution doesn't work, you can choose to make an adjustment in your WordPress installation to make it work on your temporary URL. Here's a guide for that:
1. Ensure that WordPress is installed on the domain
If you are starting a new site, you can use this guide. If you are transferring from another provider to us, you need to move your site to us.
2. Modify your wp-config.php file
We need to add an entry to the wp-config.php file.
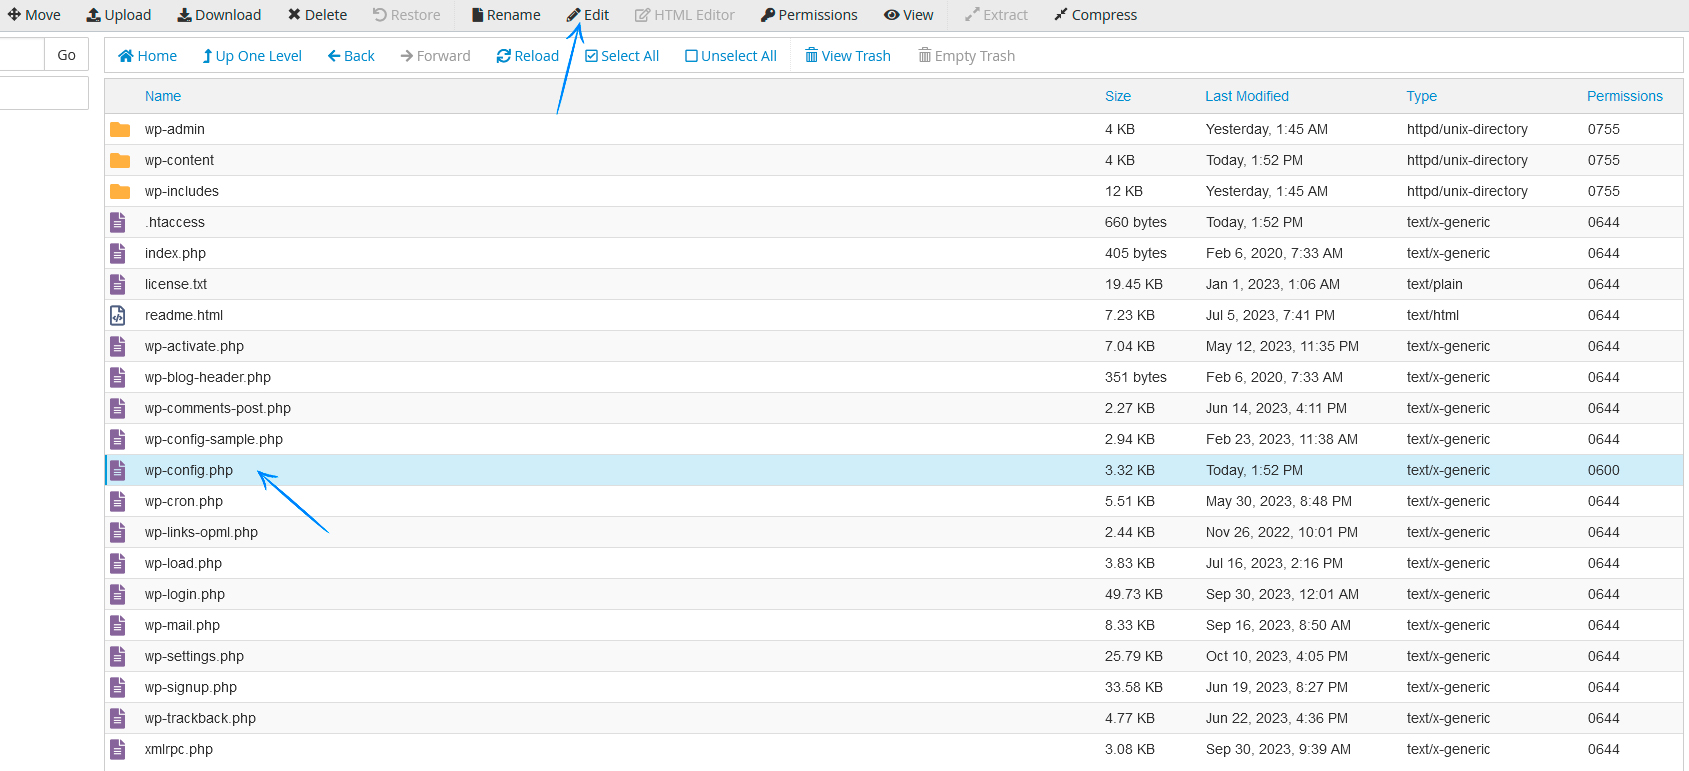
You can find this file by going to CPanel -> File Manager.
Here, you need to enter the folder where you have installed WordPress. If you have installed it directly on your domain and not in a subfolder, enter the "public_html" folder.
Locate the wp-config.php file, select it, and click "Edit."

You might get a popup; just click "Edit."
3. Add code to your wp-config.php file
Now, you need to add the following line at the very end of the file:
define('WP_HOME','http://138.201.135.131/~youraccount/');
define('WP_SITEURL','http://138.201.135.131/~youraccount/');
Replace "http://138.201.135.131/~youraccount/" with your own temporary URL, which you can find in your welcome email.
Click "Save Changes" to save your file.
4. Check if it works
Your WordPress site should now appear correctly on your temporary URL. If it still doesn't work, double-check that the two code lines above are correctly added and saved in your wp-config.php file. Ensure that you've used the correct temporary URL as well.
If everything seems correct, and it still doesn't work, we recommend trying solution 1, as described earlier in the article.
5. Remember this when changing DNS
Before changing DNS, make sure to replace your temporary URL with your actual URL in your wp-config.php file. You do this in the same way as when you added the two lines of code.
If you've added content such as links and images to your site while working on your temporary URL, we recommend installing and using the Velvet Blues Update URLs plugin, which helps ensure that your site uses your actual URL throughout.
When you believe your site is ready on our server, you can change DNS, and it will take 24-48 hours for the site on our server to appear when you visit your domain.
